| |
| Maintaining EZ Port Rollers |
| |
Increasing the Efficiency of your EZ Port 2, 3 and 4
We hear from customers that it is difficult to launch their watercraft and they have to strain and lift the machine with one or more people pushing.
There are two things you can do to eliminate this problem and make launching and docking easy for any owners:
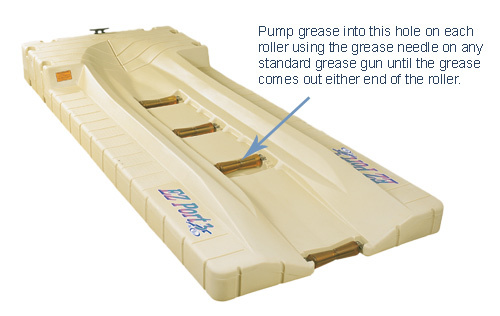
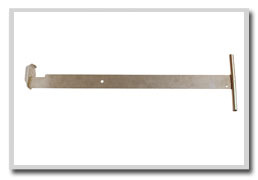
1. Grease the rollers each year - this requires a special tip that will fit on any grease gun and you can use the Lincoln Grease Needle LNC-5803 (see photo below). This part is available from The Tool Warehouse and many other online tool stores on the web (google the phrase above). The cost with shipping is approximately $14.25. |
| |
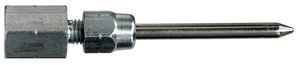 |
| Lincoln Grease Needle LNC-5803 |
| |
 |
| |
2. Adjust the rollers - the watercraft should be resting on the rollers, not the dock. If they are adjusted properly the machine will rock slightly from side to side when on the dock which keeps the watercraft off the dock while launching or docking. There are several roller adjustments you can make that either raise or lower the rollers with the third roller (on the Port 3) the most critical.
Please see this document for additional details. |
| |
| Removal of Your Docks in Ice Conditions |
| |
Your don't have to...
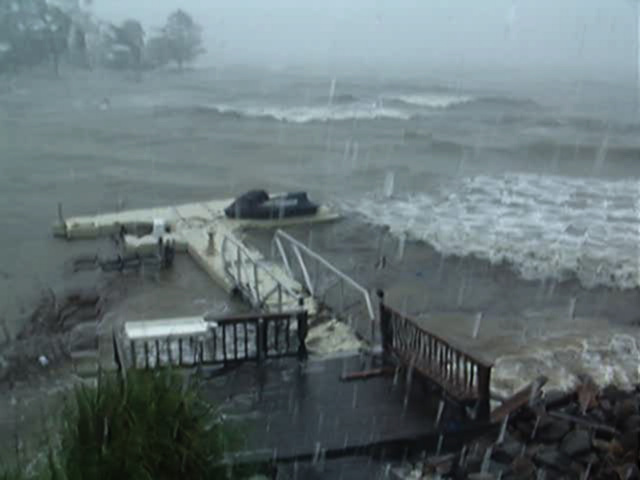
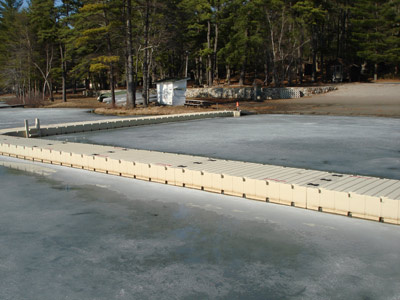
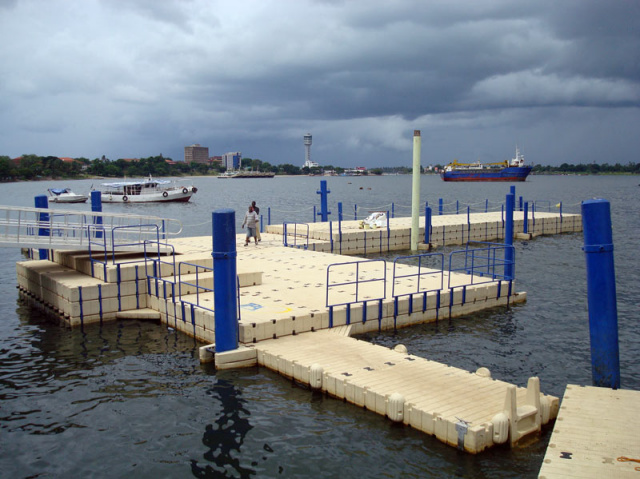
Ice has no affect on the EZ Dock System. Since an EZ Dock requires only an inch of water to float, the docks will “pop” to the top of the ice when the water freezes, much like an ice cube tray.
The YMCA of Greater NY selected EZ Dock for a number of reasons, one of which was the historical issue of removing docks in the Fall and then installing them again in the Spring. Not only was this a significant effort and expense requiring a large number of staff members dedicated to this activity, the removal of the docks actually caused damage which had to be repaired each year.
This picture was taken at the camp after a 20” ice condition for most of the winter which had no affect on the EZ Dock System. The only time you should have concern with ice conditions is when there is a significant ice flow since this often takes pilings and other anchoring systems with the ice flow as well as the dock system. |
| |
 |
| |
But should you want to remove your docks...
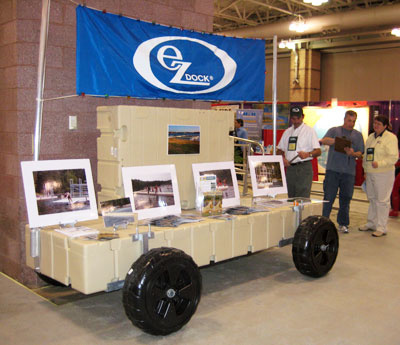
If you want to remove the docks for winter storage it is easily accomplished using the EZ Dock Dock Wheels (Part# 90050 - pictured below) which attach to the docks and allow you to “tow” the docks while connected from the water to land. Another method of removing the docks is to place PVC pipe on land and use the pipe as the roller system when towing the docks from the water. |
| |
 |
| |
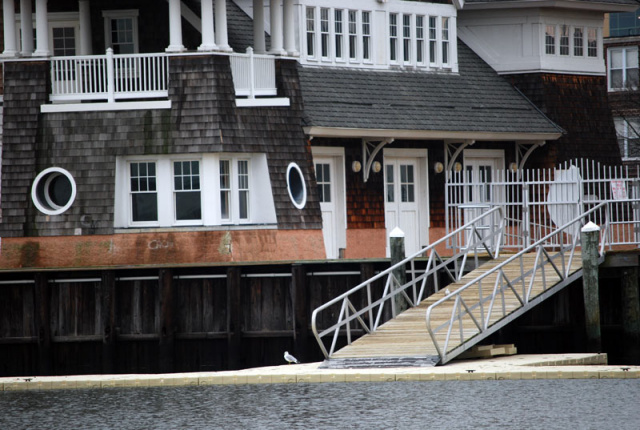
| Measuring for a FloatStep Ladder |
| |
The industry's first dock ladder to remove itself automatically when not in use is now available for fixed and floating docks (watch short video).
Gone is the marine growth and barnacles that have been a part of every ladder prior to the introduction of the FloatStep ladder.
Flip up ladders, pull up ladders and all other variations of dock ladders fail when someone forgets to remove the ladder after each use. Fixed ladder steps remaining in the water are a constant problem to customers causing injury and aggravation. Even if you have a removable ladder the increased danger of being in the water unexpectedly and not being able to access the ladder is a greater risk. |
| |
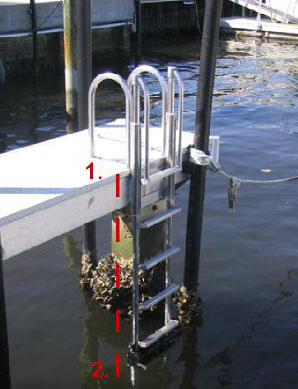
| How to measure for a FloatStep Ladder |
|
- Measure from the top of your dock to the lowest water mark.
- Add a minimum of one (1) foot to measurement.
- The resultant number tells you how many steps your ladder should have - see Example below.
Example:
- The top of your dock to the lowest water mark measures 3 ft.
- Add 1 ft. to your measurement
- You will need a 4 Step ladder
Note that adding the additional 1 foot length to the measurement will allow for safe and constant ladder availability. |
 |
|
| |
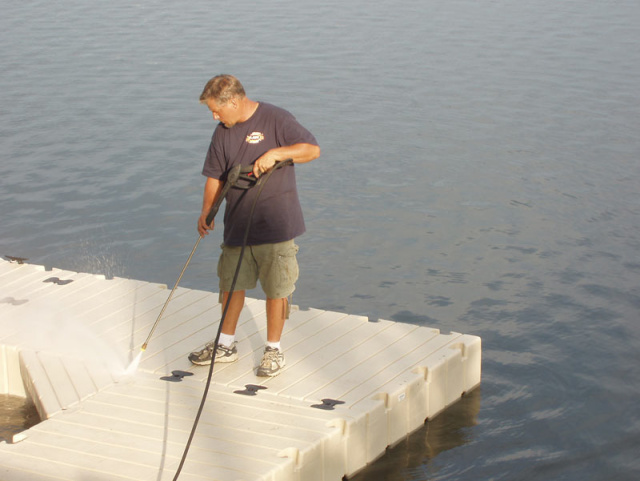
| Maintaining Docks |
| |
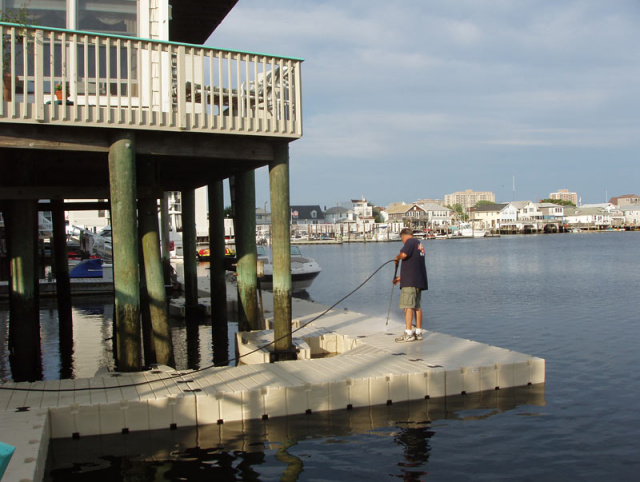
| To keep your docks looking like new simply use a power washer and use the high pressure stream of water to remove dirt and grime. A good high pressure power washer should clean your docks without any soap or cleaner most of the time. |
| |
 |
 |
| |
| Tightening Couplers |
| |
If you are in rough water locations take a few minutes in the Spring and make sure all of your coupler nuts are tight.
EZ Dock is designed to move “with” rough water much like a catepillar moves across a surface. If you want to see the advantage in using EZ Dock visit our gallery of videos and watch EZ Dock in a hurricane.
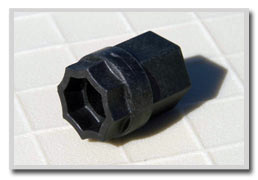
The couplers allow the dock to move and flex in rough water which could loosen nuts that hold the top and bottom connector together. Simply snug them up and you are good for another season. To tighten a coupler nut you need the socket adapter that fits on a standard 3/4" socket and drive - do not over tighten as you can break the poly bolt, just snug it up.
The socket adapater is part number 900005 and has a cost of $1. The official name of the part is DRIVE TOOL SOCKET FOR COMPOSITE PRODUCT. |
 |
| |
| Removing Couplers |
| |
|
If you are removing couplers for any reason remove the nut on the top coupler, tie a string around the threads of the bolt that the nut was covering and rock the dock by standing over the connection point. The bottom coupler will drop out and you can retrieve the bottom coupler and bolt easily for re-use.
|
 |
| |
| Adjust Free Board |
| |
|
EZ Dock is delivered with a 13.5" free board (the distance between the top surface of the dock and the water).
Some dock applications are better served with less free board, such as docks used by rowing teams. It is easy to adjust the free board and we simply put a removable “plug” in each dock in the coupler pocket and pump water into the dock until it provides the desired free board.
Using a plug with threads the water can be removed by simply reversing the process. This installation uses a 5" free board which provides rowing teams easy access on and off boats.
|
 |
| |
| Multiple Dock Levels |
| |
|
If you need a floating dock with different heights EZ Dock can be stacked two, three or four levels high.
This is a common application when different levels are required for boarding different boats that have different heights. One section of the dock could have a 13" free board, another 26", another 39".
Your EZ Dock Dealer can assist you in the hardware required to accomplish this type of installation. Often times commercial transport applications required different levels of dock for loading.
|
 |
| |
| Re-programming your Sunstream FloatLift™ Remote |
| |
Sometimes it may become necessary to re-program your remote transmitter. It is possible for the transmitter to de-program either due to loss of power (dead battery), or electrical interference.
If your remote will not work, first check to see that it is transmitting. Do this by depressing any of the three buttons and watching to see that the red LED light is working. If so, then the next step is to re-program the receiver.
Programming Instructions RC305
- Push 'Up' button once on transmitter
- Push programming button on right side of RC Box
- Push 'Up' on a transmitter 3 times
Repeat for each transmitter |
| |
| Docking Your PWC with an EZ Port 3 |
| |
|
The key to docking a personal water craft [PWC] on an EZ Port 3 is control of the Waverunner.
Any PWC with reverse makes it easier to bring the nose of the Waverunner to touch the first roller in the water. Once you have come to a stop with the nose of the Waverunner against the roller then accelerate and “climb” the machine onto the dock. Hitting the first roller or either side of the dock near the roller while moving can damage the hull of the Waverunner.
The recommended process for docking the machine is to use reverse if you have it on your PWC and stop forward motion - when the roller and hull are aligned, then give the Waverunner throttle to roll over the first roller and next three. If you do not have reverse approach the EZ Port 3 as slowly as possible but stay centered on the roller.
|
| |
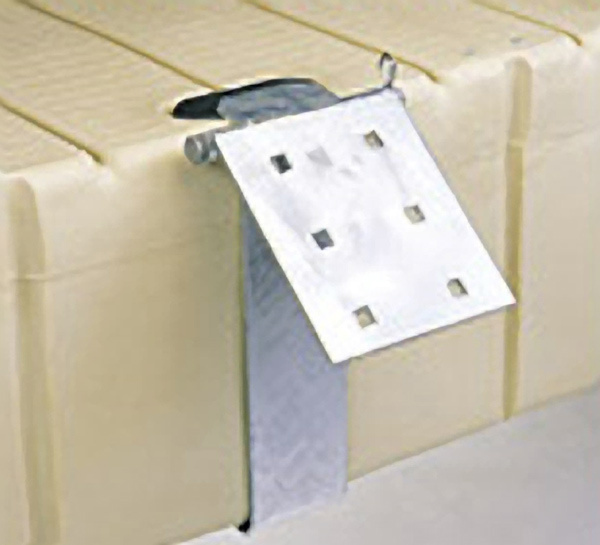
| Installing an EZ Port Using the Hinge Kit |
| |
A hinge kit comes with two connection points - each hinge has a hinge plate and a J Bracket. The J Bracket attaches to the EZ Port by inserting the J Bracket in the top pocket with the hardware connector in the bottom pocket. This secures the part of the hinge that is mounted on the EZ Port. The other half of the hinge is a flat bracket that has holes for lag bolts. The two pieces (J Bracket and Hinge Plate) are joined using a hinge pin which slides through the two pieces and is secured with a cotter pin.
Once installed It is easy to remove the Port from the floating dock - you simply pull the cotter pin out and slide the pin out - and your EZ Port is disconnected. |
 |
| |
|
The “key” to a successful installation is marking the location for the lag bolts.
- mount the J Bracket and secure it to the EZ Port
- slide the hinge pin through the J Bracket and the hinge plate and secure it with a cotter pin
- while standing/kneeling on the EZ Port hold the hinge plate against the existing floating dock and mark where the lag bolts will be located.
KEY - you must have your weight on the EZ Port and no one on the dock you are attaching to when you mark the position for the lag bolts. This negative load will then insure that when your PWC is on the EZ Port the back end will rise and keep the jet drive completely out of the water. The negative load on the installation when marking the spot for the lag bolts is critical.
Note: Depending on the free board of your existing floating dock the hinge plate can be mounted in the up (raised position above the J bracket) or at the same height as the J Bracket.
One hinge kit is adequate for securing up to three EZ Ports depending on the degree of rough water at the site.
|
| |
| Remove Dock Sections Without Losing Couplers |
| |
|
Uncoupling the EZ Dock Sections is simple and requires one tool which fits on a standard 3/4" socket drive. The tool is an adapter that will fit the coupler nut that holds the top and bottom coupler together between the dock sections. The socket adapter has a star shapped pattern that is designed to fit into the same pattern on the coupler nut.
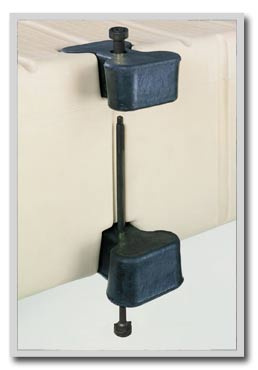
The black couplers (some people call the dog bones due to their similar shape) consist of a top coupler, bottom bottom coupler and a black plastic poly bolt and nut. The only "trick" to taking the dock sections apart is not to lose the bottom coupler which can fall out if you do not use a string on the coupler bolt for retrieval (see note below regarding string).
|
 |
Simply back off the plastic nut and remove the top coupler with a flat screw driver prying it out of the dock pocket. This will expose the black poly bolt that is left - do this for each coupler in the line that is holding the one dock section together. Only disconnect one dock at a time.
- There are six couplers if docks are joined side to side
- There are four couplers between the 80" X 10' dock sections
- There are three couplers between a 60" X 10' dock sections
- There are two couplers between the 40" X 10' dock sections
Remove only one row of coupler nuts at a time (one dock section at a time). Once you have the nut and top black coupler removed tie a string using a "slip knot" around the threads of each coupler bolt that is exposed and replace the coupler nut over the string. Stradling the two dock sections that are joined rock the docks and the coupler bottom and bolt will fall out. Keeping the string in your hand pull the string between the docks and bring the couplers to the top of the dock (otherwise the bottom coupler and bolt will fall to the bottom - they do not float).
|
 |
| |
| Pipe Brackets |
| |
| Pipe brackets can be removed in a similar manner - the Heavy Duty pipe brackets use couplers, the Light Duty pipe brackets use screws to join the upper and lower pieces. |
| |
| Piling Brackets |
| |
| Piling brackets can be disconnected easily. |
| |
| Hinge Kits |
| |
| Hinges kits simply have a cotter pin and straight pin that is removed to separate an EZ Dock that was connected to a wood dock. |
| |
| Dock Cleats |
| |
Cleats on a dock make it easy to secure the dock section after it is disconnected from the system and the cleats are strong enough to allow a dock section to be lifted by dock lines on the cleats if you have a way to hoist the dock section.
Otherwise just pull the dock section on to what dock is left and then carry it from the water via the gangway or beach path. |
| |
| |